Prerequisites
1. Oracle Software 11.1.0.6 should already installed on the server. (refer below url for step by step)
http://ravidba-oracle.blogspot.com/2008/07/oracle-11g-step-by-step-installation-on.html
2. ASM Instance should already be created & configured and should be up and running.
http://ravidba-oracle.blogspot.com/2008/03/oracle-11g-configuring-asm-for-oracle.html
Hardware/Software:
VMWare Virtual Node – 2 CPU, 1024 MB
Host Operating System – Windows XP Professional SP 3
Guest Operating System – Oracle Enterprise Linux 4 (Update 5)
Oracle RDBMS – 11.1.0.6
Oracle ASM Instance – 11.1.0.6
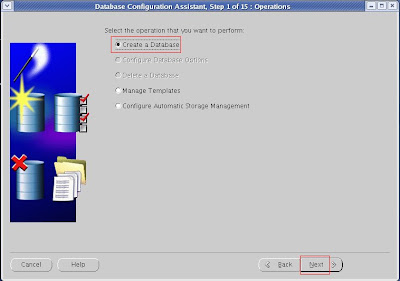
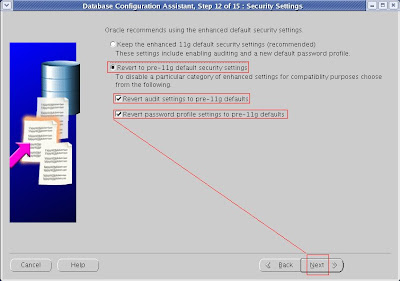
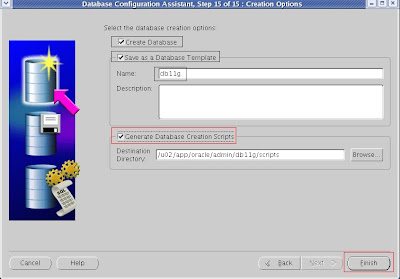
1. Run DBCA from a terminal login as Oracle user. You can use PUTTY from a HOST System as well by setting the DISPLAY for x-windows.
Select -> Create Database
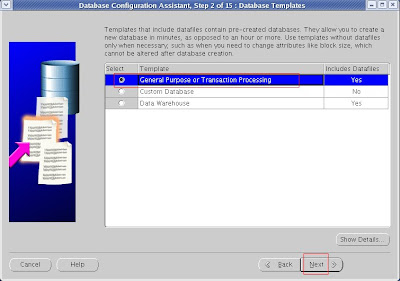
 2. Select General Purpose, as this is just for testing purpose I want to use all the features of Oracle 11g and as well with the Example schemas. Real time i would prefer to create a seed database which would be CUSTOM DATABASE.
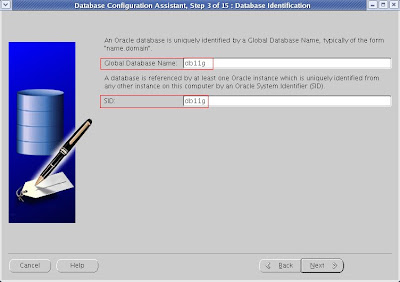
 3. Database name: Here its db11g (You can choose as you like not more than 8 Characters)
 4. Enterprise Manager Option
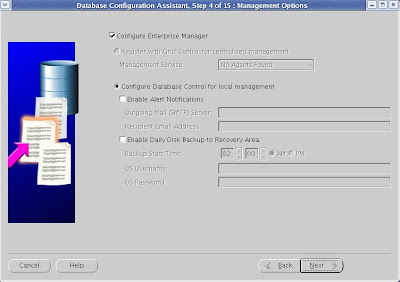 4 -1 . Warning : To configure Listener, so from a new terminal we need to run netca, please follow below URL for step by step on this.
http://ravidba-oracle.blogspot.com/2008/03/oracle-11g-netca-listener-configuration.html
 Once you are done with NETCA configuring the LISTENER, Continue
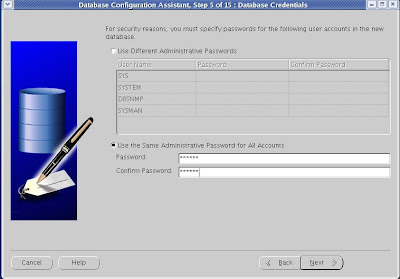
 5. I prefer to use same password (Just for testing Purpose and easy to remember)
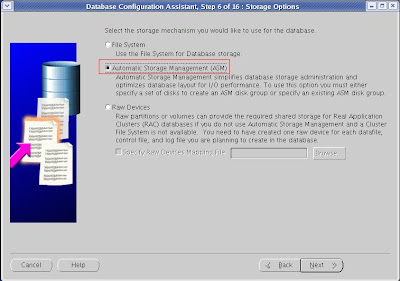
 6. Select Automatic Storage Management (ASM). Make sure that ASM instance is up & running and the LISTENER associated with it should be running as well.
 7. ASM - SYS password "It should be same as what you entered when setting up ASM Instance"
 8. Select the Disk Group Name which you would like your new database to use. Make sure that the disks are mounted and the Redundancy as set according to your needs.
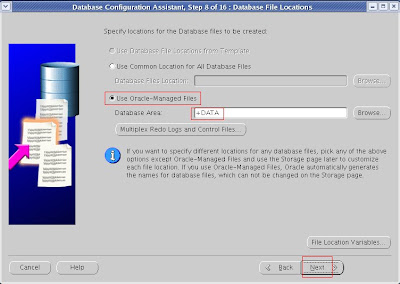
 9.Use Oracle-Managed Files - Location of the Database Area "+DATA" which it keeps all the datafiles, controlfiles, archive etc.
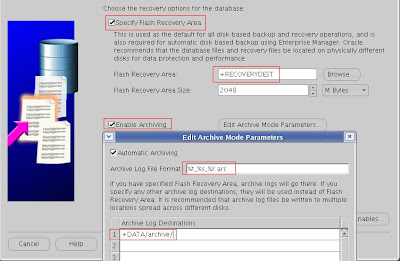
 Enable Archiving.
 11. Select Sample Schemas
 12. Memory Management - I prefereed to use Automatic Memory Management to test Oracle 11g. As default it takes 40%, I set it to 28%. Rest of the tabs, i left default.
 11. Select Sample Schemas
 12. Memory Management - I prefereed to use Automatic Memory Management to test Oracle 11g. As default it takes 40%, I set it to 28%. Rest of the tabs, i left default.
I have my new Oracle 11g database with ASM as storage, and what all remained is i need to test the new features of Oracle 11g and to gain hands on - and plan to give Oracle 11g Upgrade for Administrators.
Wish me luck - Ravi Prakash







good!!!!!!!!!!!!!!!!!!!!!!!!!!!!!!!!!!!!!!!!!!
ReplyDeletehow to check the databas created plz provide details
ReplyDeleteVery Helpful! Thanks!
ReplyDeleteits nice to understand....
ReplyDeletethank you so much..this is really helpful!!
ReplyDeleteWish you luck
ReplyDeleteSriG
nisar - connect to database using a tool such sqlplus or Oracle SQL Developer
ReplyDeleteThanks a lot. Am just dying how to create database for good number of days. This blog helped me to learn that.
ReplyDeleteThanks alot. Saved a day for me :)
ReplyDeleteHow can we do same things manually?
ReplyDeleteI mean adding a new instance manually?
good screenshots....
ReplyDelete